カメラの利用(UIImagePickerController)(Swift)
iOSでカメラ機能を利用する最も簡単な方法は、UIImagePickerControllerを利用する方法だろう。
写真撮影に加えて画像処理等も行いたい場合、UIImagePickerControllerでなく、AVFoundationを使うという手もある。
まず、ViewControllerでUIImagePickerControllerDelegateとUINavigationControllerDelegateを継承する。
class ViewController: UIViewController, UIImagePickerControllerDelegate, UINavigationControllerDelegate {
次に、viewDidAppearでUIImagePickerControllerのインスタンスを生成し、presentViewControllerで表示するだけである。
    override func viewDidAppear(_ animated: Bool) {
        let picker = UIImagePickerController()
        picker.sourceType = .camera
        picker.delegate = self

        presentViewController(picker, animated: true, completion: nil)
    }
imagePickerControllerメソッドは、シャッターボタンを押下し、"Use Photo"を押下したときに呼ばれるメソッドである。このメソッドで、撮影した写真をカメラロールに保存することができる。
    func imagePickerController(_ picker: UIImagePickerController, didFinishPickingMediaWithInfo info: [String : Any]) {
        print(#function)
        // print(info[UIImagePickerControllerMediaType]!)
        let image = info[UIImagePickerControllerOriginalImage] as! UIImage
        // 撮影した画像をカメラロールに保存
        UIImageWriteToSavedPhotosAlbum(image, nil, nil, nil)
    }
コード全体を以下に示す。
import UIKit

class ViewController: UIViewController, UIImagePickerControllerDelegate, UINavigationControllerDelegate {

    override func viewDidLoad() {
        super.viewDidLoad()
        // Do any additional setup after loading the view, typically from a nib.
    }

    override func viewDidAppear(_ animated: Bool) {
        let picker = UIImagePickerController()
        picker.sourceType = .camera
        picker.delegate = self

        presentViewController(picker, animated: true, completion: nil)
    }

    override func didReceiveMemoryWarning() {
        super.didReceiveMemoryWarning()
        // Dispose of any resources that can be recreated.
    }

    func imagePickerController(_ picker: UIImagePickerController, didFinishPickingMediaWithInfo info: [String : Any]) {
        print(#function)
        // print(info[UIImagePickerControllerMediaType]!)
        let image = info[UIImagePickerControllerOriginalImage] as! UIImage
        // 撮影した画像をカメラロールに保存
        UIImageWriteToSavedPhotosAlbum(image, nil, nil, nil)
    }

    func imagePickerControllerDidCancel(_ picker: UIImagePickerController) {
        print(#function)
    }
}
尚、iOS 10以降でカメラを使用する場合、Info.plistで予めNSCameraUsageDescriptionキーでカメラ初回使用時のメッセージを設定しておく必要がある。さもないと、アプリが以下のようなログとともに起動直後に落ちてしまう。
This app has crashed because it attempted to access privacy-sensitive data without a usage description. The app's Info.plist must contain an NSCameraUsageDescription key with a string value explaining to the user how the app uses this data.
また、撮影した画像をカメラロールに保存する場合、やはりInfo.plistで予めNSPhotoLibraryUsageDescriptionキーで写真初回保存時時のメッセージを設定しておく必要がある。(iOS 11は後述)こちらも以下のようなログが出力されてアプリが落ちてしまうので気にしておこう。
This app has crashed because it attempted to access privacy-sensitive data without a usage description. The app's Info.plist must contain an NSPhotoLibraryUsageDescription key with a string value explaining to the user how the app uses this data.
例えば、Info.plistでこんな感じにキーと値を設定しておく。この値はアプリが初めてカメラ、及びカメラロールにアクセスする際にダイアログとして表示される。Info.plistをProperty List表示している場合は、"Privacy - Camera Usage Description"キー、及び"Privacy - Photo Library Usage Description"キーを追加してStringの値を設定しても同じである。
	NSPhotoLibraryUsageDescription
	I will access to the Photo Library
	NSCameraUsageDescription
	I will need a camera
iOS 11でプライバシー関連の変更があった。iOS 11ではカメラロールにアクセスすると、以下のようなログが出力される。
This app has crashed because it attempted to access privacy-sensitive data without a usage description. The app's Info.plist must contain an NSPhotoLibraryAddUsageDescription key with a string value explaining to the user how the app uses this data.
これを解消するには、Info.plistでNSPhotoLibraryAddUsageDescriptionを設定する。
	NSCameraUsageDescription
	I will need a camera
    NSPhotoLibraryAddUsageDescription
    I will access to the Photo Library
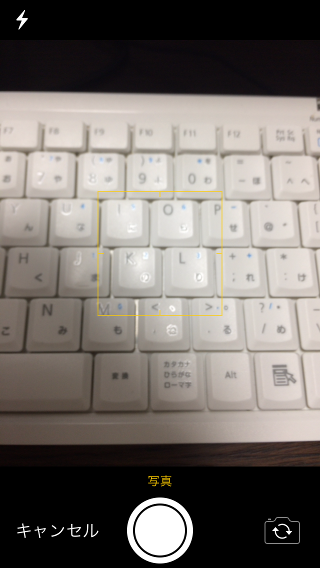
作成したアプリを実行すると、以下のような画面が表示される。(iOS 11でアプリ実行)Info.plistでLocalization native development regionをJapanに変更しているので、UIは日本語表示になっている。

- UIImagePickerController
- UIImageWriteToSavedPhotosAlbum
- UIImagePickerControllerDelegate
- UINavigationControllerDelegate
| 新着情報 |
|---|
| 【オープンソースソフトウェア環境構築】Apple silicon Macで開発環境を構築 |
| 【Rust Tips】Actix webでJSONをPOSTする |
| 【Rust Tips】コマンドライン引数を取得する |